This work is licensed under a Creative Commons Attribution-ShareAlike 4.0 International License.
Copyright © Cay S. Horstmann, Kathleen O’Brien 2009-2016 
This work is licensed under a Creative Commons Attribution-ShareAlike 4.0 International License.
Lab 1 Fred Foo (Scribe) / Becky Bar (Driver)Lab 1 Becky Bar (Driver) / Fred Foo (Scribe)Part A
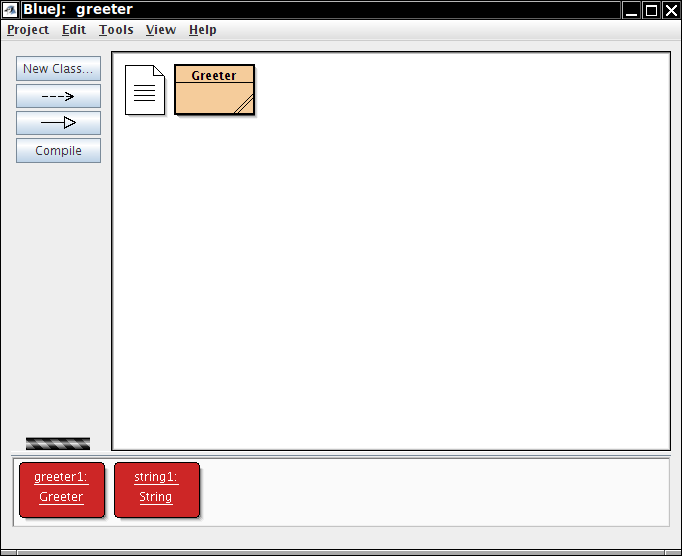
lab2a in the cs46a/labs folder. Make a class Greeter by clicking the New Class button and typing in the name Greeter. Double-click on it, erase its contents and paste in the contents of this file. Don't look at it—we'll have a close look in a week or so. Just hit Compile and Close. new Greeter() from the menu. Click Ok on the dialog. What happens?
(scribe)
When the lab instructions ask you a question about what you did, the scribe needs to enter the answer into the lab report. For example, "got a red blob"
You have just created a representation of an object on the workbench
greeter1. What two methods do you get in the middle of the menu? sayHello. What happens?sayGoodbye. What does the sayGoodbye method do?Greeter class (the rectangle on top), right-click and pick the new Greeter(String name) constructor call. Supply driver's name as the construction parameter. Remember to use quotation marks to specify a string. sayHello method on this new object. What does it return?
string1 object. You'll get lots of methods. Call the length method. What does it return? If you can not see the length method, click "more methods" at the bottom of the list. You may need to click "more methods" a second time to see all the methods.
toUpperCase method. What does it return?replace method ( replace(CharSequence, CharSequence)).
The method needs two parameters, both of which will be Strings. (A String is a type of CharSequence).
The first String is the String you want to replace and the second is the value you want to use instead.
Supply the two String parameters so that the method will return Hetto <driver name>! (if the driver's name is Carlos, the return value should be Hetto Cartos!)What parameters did you supply?
(Be careful about quotation marks. Strings need to be surrounded with double quotes)While replacing the whole word "Hello" with the word "Hetto" would work, it is not what is wanted here. Just replace the single String "l" with the String "t".
Interacting with the red blobs is nice because it makes you visualize objects as ... well, red blobs. The point is that an object is something on which you can call methods.
It's nice that you can explore objects without having to write a whole program with public static void main and all that.
Here is another way in which you can explore objects in BlueJ. Select View -> Show Code Pad. In the bottom right corner, you get a window into which you can type instructions. That window is pretty small. Drag the borders to make it bigger.
Type in
string1.length()
What happens?
toUpperCase() on string1 in the code pad. (You will type: string1.toUpperCase() )Scribe: What was the result?string1 in the code pad which will print string1. Scribe: What result do you get? Why isn't it uppercase? This is important. If you do not know, ask your lab instructor.string1 in the code pad which will print string1. Scribe: What result do you get? Why are the l's not replaced with t's? This is important. If you do not know, ask your lab instructor.string1 red blob. Click Inspect. Then click Inspect again. What do you see?greeter1 object in the Code Padgreeter1.sayHello() Scribe: What result do you get? Part C
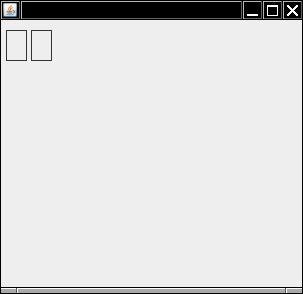
Rectangle class of the graphics library in the videos. Launch BlueJ. Make a new project lab2b in your cs46a/labs folder. graphics directory in the zip file so that it ends up inside cs46a.lab2b project, select Project > Import ... and navigate to the graphics directory that you just unzipped. Select the folder and confirm. What happens?Rectangle class and construct a new Rectangle(5, 10, 20, 30), What happens?
How did you construct the second rectangle? (driver)
translate method on the first rectangle with parameters 100 and 50. You may need to downsize some of your windows to find the form with the rectangles. What happens?grow method on the first rectangle with parameters 50 and 25. What happens?
Part D
Enough about rectangles. It's time for robots.
lab2c. Import the graphics files as you did in part C. This contains the Horstmann graphic classes plus a Robot class you will need in thist lab. Be sure to download this file. It contains extra files not in the file downloaded in class. Be sure to put this file somewhere so you can find it again. You will need it throughout the semester.Robot class on the workbench and select the second constructor:
new Robot()
In the Create Object popup, leave the robot name as robot1 and press OK Scribe: What happens?

To construct a robot from this image at a different location , right-click on the Robot class in the workbench and select the first constructor
new Robot(int x, int y, String imageFile)(The image is in the files you downloaded in a previous step. roomba.png)