
This work is licensed under a Creative Commons Attribution-ShareAlike 4.0 International License.
Copyright © Cay S. Horstmann, Kathleen O’Brien 2009-2014
This work is licensed under a Creative Commons Attribution-ShareAlike 4.0 International License.
See lab2 for reporting instructions.
You have used our robot class for a couple of labs. Now you'll see how to build such a class yourself. Make a project lab3 inside your cs46a/labs directory and import the graphics classes as you did in lab 2. Then right-click on the Robot class and select “Delete”. We do not want that one. We'll make our own in a minute.
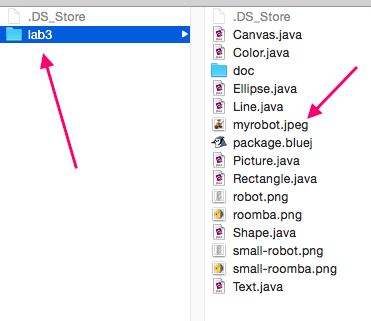
See the robot image above? Save it as myrobot.jpeg in your cs46a/labs/lab3 folder. If you do not know how to save an image from the Internet, ask your instructor. Here is what my lab3 directory looks like on my Mac. myrobot.jpeg is inside the lab3 project folder.
Now make a new class Robot in the lab3 project. Open it in the editor. Remove everything inside the class leaving the opening and closing braces. A robot has an x- and y-position. Add instance variables for the x-position and the y-position. Declare them as ints. Driver: Put the instance variable declarations in your report.
public Robot(int theX, int theY)
{
      ....
}private Picture pic;In the constructor, initialize it with
pic = new Picture("myrobot.jpeg"); pic in the constructor but simply assign a value to it. That means you do not write Picture pic = new ...Robot class, and select the constructor. In the dialog box, add values for x and y. What happens? Did you see your picture? If not, why not?draw method on a Picture object to actually display the picture. Do that in the constructor and repeat the preceding step. Now your picture should show. Driver: Exactly what did you add to the constructor? moveRight. Add the method header for the moveRight method.
access-specifier return-type method-name(parameter-list)
moveRight method, we want to move by pic.getWidth() pixels, so that it moves just to the right of where it was before. Simply call pic.translate with the parameters needed to make this happen. Driver: What did you put into the method?moveRight (by right-clicking on the red blob). Scribe: What happens?Congratulations, you just programmed a robot!
moveDown that makes the robot move downwards by the height of the image. Driver: What is the code of the method? moveHorizontally. This method has a parameter. After you finish coding the method, you will call the method in the workbench by creating a robot1 object, right clicking and selecting moveHorizontally() and entering 5 as the parameter. Driver: Write the javadoc and the method header. What are they?n or units or steps. Whatever it is, you will need it when you implement the moveHorizontally method. Translate the picture. In the call to translate, multiply the parameter with the picture's width. Driver: What is the body of the method?pic.getWidth(). Otherwise, the robot moves only 5 pixels or -3 pixels. That's not what we want.moveVertically method in exactly the same way. Driver: What is the code?/**
Gets the horizontal grid location of this robot.
@return the horizontal grid location
*/
public int getX()
{
return x;
}
Scribe: Is this method an accessor or a mutator? Why?
moveHorizontally(5). Scribe: What value do you expect to get when you call getX?getX (on the red blob, as before). Scribe: What value did you actually get? Why?
x. Update x in the moveHorizontally method. (Hint: What do you expect x to be after calling moveHorizontally(5), then moveHorizontally(-3)? Driver: What change did you make to the method?moveHorizontally(5), then moveHorizontally(-3), then getX. What value do you get?x location. Which method is that? (Hint: What other method changes the x coordinate?) What is the fix?y value. Add an accessor and fix the appropriate mutator methods to update y Driver: Past in the code for your class.In the preceding sections, you tested methods by directly executing them in the Bluej workbench environment. That's great for initial development, but as your projects get more complex, it becomes quite tedious. To be more productive, you should write tester programs. Next semester, you will learn how to use a professional testing framework, but for now, we use an approach that is much easier and also quite effective.
Whenever you want to test something, write a program that does some work, then prints out both the actual and the expected values of a method call. By convention, the program name ends in Tester.
For example, when you moved the robot by 5 units and then by -3 units, you expected its x position to be 2 units.
To your Bluej project add a class MoveTester. Remove everything inside the class leaving the opening and closing braces. Add a main method: public static void main. Then in the main method do this:
System.out.println(robot.getX());
System.out.println("Expected: 2");
Driver: What is the complete source code of your tester class?
y position. Driver: What lines did you add to the program? x and y instance variables. They are a bit of a waste because the Picture object also has x and y positions. Suppose the robot moves to the right. Then x is increased, and pic.getX() is also increased. Scribe: Are they increased by the same amount? (You may want to think through what happens when you move by 1 unit.)pic.getX() becomes n * pic.getWidth() . Scribe: Therefore, how can you compute the robot's x value from pic.getX() and pic.getWidth()?Think of it as an algebra problem.getX() method to return pic.getX() / pic.getWidth(). Run the tester again. Scribe: What happens?getY() method in the same way and re-run the tester. It should still pass. Driver: What is the code of the changed method?getX and getY methods no longer use x and y at all. Scribe: Is there any need to keep these variables, or can they be eliminated? Explain your answer.