
This work is licensed under a Creative Commons Attribution-Noncommercial-Share Alike 3.0 United States License.
Copyright © Cay S. Horstmann 2010-2015
This work is licensed under a Creative Commons Attribution-Noncommercial-Share Alike 3.0 United States License.
Modified by:
ls, pwd, cp, cat, diff commands in their basic forms-classpath option to specify the location of the class filesStart with lab2.zip and create a project lab2, following Step 1 of these instructions. You'll need the file deptdir.txt again. If you don't have it any longer, download it as deptdir.txt onto your computer.
Run the AddressBookDemo (Check Lab 1: E.1 in case you forget how.). In the file chooser, navigate to whereever you saved the deptdir.txt file, and click on Open.
Look up the phone number of your Dr. Khuri. (Enter the number of the command. The key is Phone.)
Then select Remove Entry.
What happens? Why? (You'll need to read through the source code.)
In the AddressBookDemo class, implement the removeEntry method, using the lookupEntry method for guidance.
What is the code of your removeEntry method?
Start the program again as described before and select Remove Entry.
What happens? Why? (You'll need to read through the source code.)
Ok, we'll need to implement the remove method of ArrayListAddressBook. And then we'll need to test it. Chances are you won't get it right the first time.
In that case you'll run the program, select the directory, click Open, select Remove Entry, find it didn't work, run the program, select the directory, click Open, select Remove Entry, find it didn't work, run the program, select the directory, click Open, select Remove Entry, and on and on and on. That's a lot of clicks.
For now, we will not implement the remove method, but learn how not to click so much.
If you need to repeat the same set of operations many times over, there is a better way: the command line interface. The command line interface is harder to use initially, but it gives you a lot of power.
Look at it this way. If you just want to snap vacation photos, you'll use a "point and shoot" camera. It requires no training and takes decent pictures.
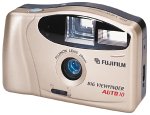
But if you want your photos to be published in a magazine, you will need a professional camera. You will need to spend time learning rather technical concepts such as f-stops and shutter speeds.
In this lab, you will begin to learn the command shell. You will use the command shell throughout the semester for many tasks.
On Lubuntu, type Ctrl-Alt-T to open a terminal or launch the LXTerminal app in the Accessories menu.
If you know how, you can also use the terminal on Mac OS X, but you are completely on your own. You cannot do this lab with the Windows terminal.
You will get a window that looks somewhat like this.
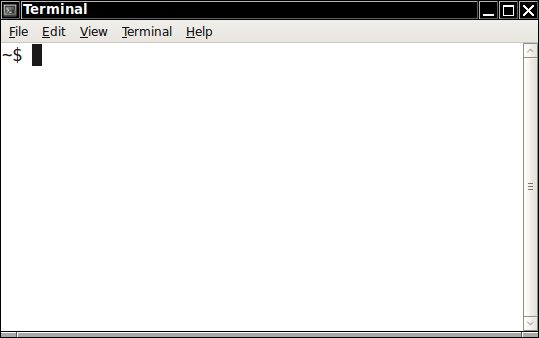
Never seen one of these before? Congratulations—you have just reached level 2.
You type commands into the terminal, and you get responses in plain text.
After each command, you hit the Return key. Let's try it out. Type ls followed by Return. (ls stands for “list”.)
What happens? If nothing interesting happens, try ls -a instead (i.e. ls, a space, a hyphen followed by a without any space, and finally Return. This shows all files, including the “hidden” ones.)
When you first open a terminal window, you are in your home directory. Its location depends on the operating system and your user name. To see exactly what that directory is, type pwd followed by Return.
What is your home directory?
To see the contents of another directory, use ls followed by the directory name. Try listing the contents of your downloads directory. In Lubuntu, it is located at /home/user/Downloads. On the Mac, if you don't already know or you can find it yourself, this would be a good time to launch the VM. What files did you find?
Let's try that again. Try typing ls /home/user/D, then hit TAB.
What happens when you hit TAB?
This auto-completion feature is similar to the Ctrl+Space feature in Eclipse, and it is a huge time saver. Experienced shell users almost never type a full file name but use TAB whenever possible. It is faster and it cuts down on errors.
Next, let's find the lab2 Eclipse project. The details depend on where you unzipped the lab2 folder. If it's on the desktop, try a directory such as /home/user/Desktop/lab2. You aren't actually using the desktop, right? You should have it in some place such as /home/user/cs46b/lab2.
If you are using a virtual machine, but did part A outside the virtual machine, you need to find out how to access the “outside world”. Look in the /media directory for a link to the home directory of the host. If there is no such link, you need to repeat the installation of part A inside the virtual machine.
In which directory is your project? What happens when you type ls followed by that directory?
Another useful feature of the shell window is command line recall.
Hit the ↑ and ↓ arrow keys a few times. What happens?
Now use the ↑ and ↓ arrow keys to recall the command that lists the lab2 directory, then add path_to_your_project/bin (without a space) after lab2.
What files are listed in that directory?
These are the compiled files of your application.
The cp command copies one or more files. We will use its simplest form here. We want to copy the deptdir.txt file to the current directory.
Where did you put the deptdir.txt file? Give the full path name.
Now type
cp -v /path/to/deptdir.txt .
Replace /path/to with the actual path to deptdir.txt, such as /home/user/Downloads/deptdir.txt.
Type a space and a period after the full path.
The period indicates the current directory (the one that is printed by pwd). You are copying the file to the current directory.
The -v indicates the “verbose” option, in which you get some feedback what happens.
What feedback did you get?
Now type
ls
What happens? Why?
We will soon be modifying our deptdir.txt file. Let's make a copy to be safe. Copy deptdir.txt to deptdir.original.txt in the current directory, using the cp command.
What command did you use?
javac -version followed by the key labeled ↲, Return, or Enter in the shell window.
That's javac, not java.
What happens?
java -classpath followed by the name of the full path to lab2/bin and AddressBookDemo. For example,
java -classpath /home/user/cs46b/lab2/bin AddressBookDemo
Be careful with the letter case in AddressBookDemo.
Don't type this from scratch. Hit ↑ until you find the ls command from C.6. Add a space and AddressBookDemo. Then hit Home (Ctrl+A on the Mac), erase the ls and add java -classpath. Hit ↲ when you are done.
What happens when you run the AddressBookDemo?
Now run the program again, using only two keystrokes.
What are the keystrokes?
You need a professional text editor for this lab. Mac TextEdit or Lubuntu gedit will not suffice. Some students have a professional text editor that they like and know, but more often than not, it turns out that they don't actually know it all that well. So, even if you love your text editor, you'll need to install the one that we use in the lab.
The professional text editor that we use in this lab is called Emacs. It is available on all major operating systems, so you won't have to learn another editor if you switch operating systems—which most professional programmers need to do at least occasionally. It is very powerful and has a huge set of extensions.
“Emacs outshines all other editing software in approximately the same way that the noonday sun does the stars. It is not just bigger and brighter; it simply makes everything else vanish. ”—Neal Stephenson
If someone tells you that Emacs is old-fashioned and hard to use, don't listen—modern versions of Emacs have menus and dialogs and require no special training.
Emacs is already installed on the Lubuntu VM. Mac users can install Emacs for Mac OS X, but as always, they are on their own working out the details.
Start Emacs. In Lubuntu, pick Emacs from the menu. Or, in a terminal, type
emacs &
Select Options -> Use CUA keys(Cut/Paste C-x/C-c/C-v) and Options->Save Options. At the bottom of the window, in a ”status line”, Emacs tells you that it saved the options in a file.
(If you can't see the status line, maximize the Emacs window.)
What is the name of this file?
.emacs. Note the period (.) before the filename.
(Mac OS X users: If you do not see such a file, you now know why we keep pestering you to use the virtual machine. For now, cancel the file dialog and type the key combination C-x C-f .emacs RET, that is, hold down Control and X, let go of X but not of Control, type F, let go of both, then type the six characters .emacs behind the ~/ and then hit the Return key.)
At the end of the .emacs file, add the following lines:
(prefer-coding-system 'utf-8-unix)
(setq indent-tabs-mode nil)
(setq require-final-newline t)
Just copy from this page and paste it in with Ctrl+V.
Select File -> Save from the menu.
What does the status line at the bottom of the window say?
Exit Emacs and start it again. Use File -> Open and open the file ~/.bashrc.
Note the dot (.) before the letter b. It is a part of the file name.
The ~ character denotes the “home directory” of the current user.
What is the contents of the file?
What is the prompt in your system?
Close the window when you are done.
export PS1='\w\$ '
exactly as it appears here, as a string of eighteen characters, including two spaces, two backslashes, two single quotes, and two uppercase letters. Just copy/paste it.
Save the file. Open another terminal window.
What prompt do you get now?
PS1 is an environment variable, a variable that controls the behavior of the shell. PS1 sets the prompt string. The \w sequence denotes the path to the current directory. The \$ sequence yields a $ for a non-administrator, a # for an administrator. (This is useful to alert you when you are logged in as an administrator.)
Mac users—this probably didn't work for you, unless you configure your system so that it loads .bashrc—Google for "bashrc mac". Or you could just launch the VM.
deptdir.txt file in Emacs. At the bottom, enter
Peña
Email
Jose.Pena@sjsu.edu
Phone
(408) 924-5060
How did you enter the ñ?
C-x 8 ~ n, that means Ctrl-X, then 8, then ~, then n. What happens?C-x 8 3 / 4, that is Ctrl-X, then 8, then 3, then /, then 4. What happens?M-x describe-char, that is, hit Alt+X followed by describe-char and the Return key. What happens?
VULGAR FRACTION THREE QUARTERS. What are the Unicode code point and name of ñ?
C-x 8 RET, that is, Ctrl-X followed by 8 and the Return key. Then type VULGAR and hit the TAB key. What happens?C-x 8 RET and SMILING. Hit TAB twice until you get a similar list. Pick SMILING CAT FACE WITH HEART-SHAPED EYES. What happens? (If you got a funny looking box, then select Options -> Set Default Font and change the font to Sans Regular.) String is a sequence of 16-bit char values, each between 0 and 65535, which represent the Unicode code points. How can you tell now that they didn't tell you the whole truth?M-x morse-region RET. That is, Alt+X, morse-region, and the Return key. What happens?C-z to undo that. Also, to get rid of that other window with the character information, hit C-x 1. M-x doctor.