
This work is licensed under a Creative Commons Attribution-Noncommercial-Share Alike 3.0 United States License.
Copyright © Cay S. Horstmann 2010 - 2015
This work is licensed under a Creative Commons Attribution-Noncommercial-Share Alike 3.0 United States License.
Modified by:
cd, mkdir, and find shell commandsThe parts marked ![]() like this are optional. But you must finish all optional parts before leaving early.
like this are optional. But you must finish all optional parts before leaving early.
This lab continues from lab 2. If you finished lab 2, just clone lab2 project and rename it to lab5 (To clone: Right click on lab2 in the Package Explorer, Copy, then Paste. It will give you the option to rename). If you did not finish lab 2, start with this code and make it into a project lab5, following Step 1 of lab 1 instructions. You will also need the file deptdir.txt.
Open a shell window. Run
java -classpath /path/to/project/build/classes AddressBookDemo /path/to/deptdir.txt
For</path/to/project/build/classes>: replace it with absolute path to your "bin" folder in the Eclipse project.
For </path/to/deptdir.txt>: replace it with absolute path to your "input" file (deptdir.txt).
If you use your own "lab2" project folder, make sure you don't use packages within your project definition.
Be sure to supply the correct path to the directory holding the Eclipse project and the deptdir.txt files.
What is the command line that you used to launch the program? (Tip: You may be able to paste it from your previous lab report.)
What happens? Why? (You'll need to read through the source code.)
OK, we'll need to implement the remove method. (Read through part B to do this part)
remove Methodget and put in ArrayListAddressBook. With your buddy, formulate a plan for implementing remove.
What is the pseudocode for your plan (i.e. as a mixture of English and Java)?
You can call one of two remove methods of the ArrayList class.
From your prior programming experience, what kind of error do you and your buddy think you are most likely to make when implementing the remove method?
remove method, but first you need to know how to implement a test class. 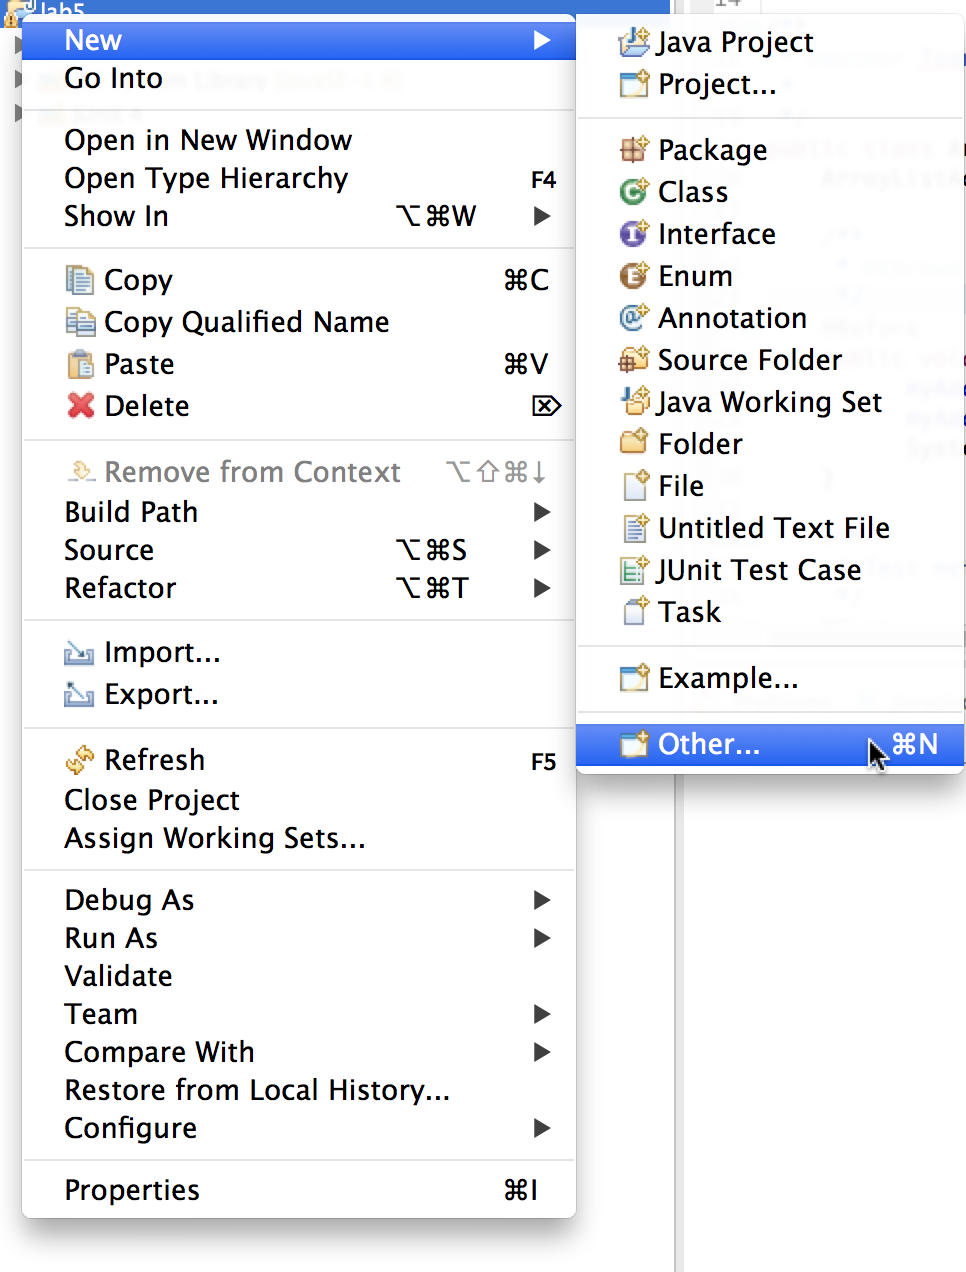
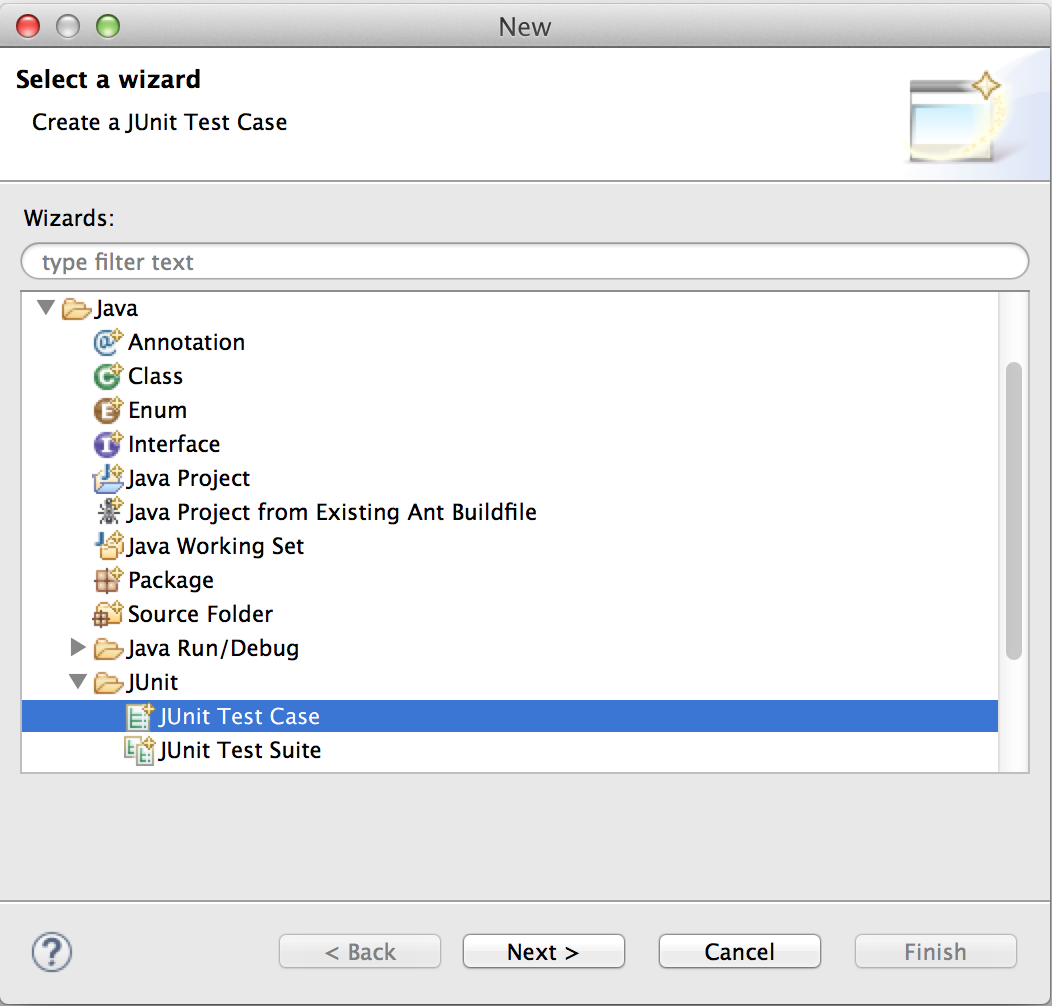
Select JUnit → JUnit Test Case. Click Next.
In the next step, give the class name ArrayListAddressBookTest. The naming convention for a test class is to have the name of the class that is being tested, with the suffix Test. Make the selections circled in red.
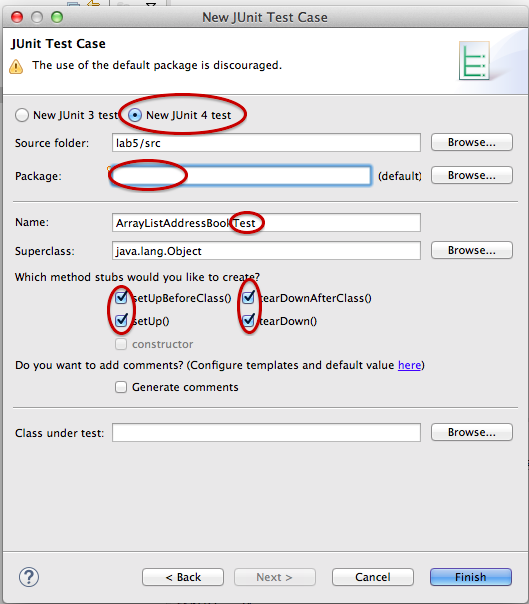
ArrayListAddressBookTest, replacing the @Test test() method if it is present.
   @Test
	 public void anEmptyDirectoryHasNoFred()
	 {
	     AddressBook dir = new ArrayListAddressBook();
	     assertNull(dir.get("Fred", "Phone"));
	 }
Note two things:
@Test is an annotation—something you can add to a method, field, or class to make some processor (in this case, the JUnit test framework) take some action. JUnit will run all methods that you annotate with @Test. It won't run other methods. (It assumes that those are your helper methods.)assertNull method is a static method of the class org.junit.Assert. The static import statement at the top of the test class let's you omit the Assert class name before the method call. This method checks that the return value of the get method is null. If it isn't, it tells the framework and...you'll see soon what happens in that case.Right-click on the ArrayListAddressBookTest class and select Run As → JUnit Test.
What happens?
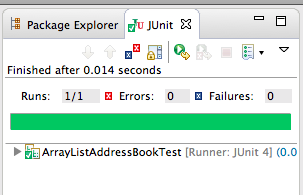
It is very easy to (a) add more tests and (b) re-run the tests every time you change your code. If the bar stays green, be happy. If it turns red, be happy too—it is much easier to fix a bug that you know how to reproduce than one that occurs in the wild.
remove methodThe process for writing a test: Come up with a descriptive method name and annotate it with @Test. Then put in some actions that should pass.
Start with the bread-and-butter scenario first. Remove an entry that is present and see that it is no longer there. Follow this outline:
Assert class methods of the JUnit API.Your unit test can only use the public API of the class that is being tested. (OK, technically, public or package-visible...) That's still better than the tests that we ran in the previous lab. Those tests were only able to use the user interface that the program made available to human users.
remove method in the AddressBook interface. It returns a value. What is that value supposed to be if the entry is not present? Write a test that removes an entry from an empty directory and checks that the correct value is being returned.
What is the code of your test method?
This exercise shows one value of TDD. Writing a test case forces you to understand all aspects of the task that you are about to implement, before you start implementing it.
What is the code of your test method?
ArrayListAddressBookTest class again and select Run As → JUnit Test.
What happens? Why?
remove Methodremove method, following your plan of part B.
What is the code for your remove method?
Did all of your tests pass? If not, which ones failed?
Do you know that your code is now correct? Why or why not?
remove method of the ArrayList class is not very efficient. It has to shift all the entries after the one being removed by 1 to prevent leaving an empty entry. Look at the example below:
A B C X D E F →
A B C D E F
Since you don't care about the order, you could just move the last entry into the slot to be removed:
A B C X D E F →
A B C F D E
Reimplement your remove method, using that implementation strategy.
What is the code for your remove method now.
Did all of your tests pass? If not, which ones failed?
This is when a unit test suite shines. If you have the tests available, you are more likely to improve your code since testing it is so easy.
For example, let us temporarily change the contract for remove, requiring that it throws a NoSuchElementException if you remove a non-existent entry.
Change the implementation of your remove method
What is the code for your remove method now.
Did all of your tests pass? If not, which ones failed?
Fix any failing tests before you go on.
What is the code for your test case?
catch clause, which is really tedious).
The designers of JUnit thought of this. Read through the documentation of the Test annotation.
What do you do to fix up your test case?
public class ArrayListAddressBookTest
	 {
	 private AddressBook dir;
	 ...
	 }
You need to initialize it somewhere. Look at the ArrayListAddressBookTest class again. When Eclipse created it, it provided several methods for you.
What are they?
@Before. That method is run before every test case.
   @Before
	 public void setUp()
	 {
	     dir = new ArrayListAddressBook();
	 }
Reimplement your ArrayListAddressBookTest class in this way. Remove all local variables of type AddressBook or ArrayListAddressBook. Use an instance variable, and initialize it in the @Before method.
What is the code of your ArrayListAddressBookTest class?
Did all of your tests pass? If not, which ones failed?
Fix any failing tests before you go on.
setUp to another name such as initialize or foo. Re-run the test class.
What happens? Why? (Careful. The result may not be what you expect.)
There are three other annotations. @After can be used to undo the effects of @Before. This is commonly used when testing file or database code. In the @Before method, you open a file or establish a connection, and you close it in the @After method. The @BeforeClass and @AfterClass methods are useful for doing setup that is required by multiple tests and doesn't need to be repeated before each individual test.
@Before. Suppose that many of your tests want a dictionary that contains all entries of deptdir.txt. Add an instance variable deptDir to the ArrayListAddressBookTest class and add the code to load the entries:
@Before
public void setUp()
{
   dir = new ArrayListAddressBook();
   deptDir = new ArrayListAddressBook();
   deptDir.load("deptdir.txt");
}
Also add a test case
@Test
public void deptDirContainsHorstmann()
{
   assertNotNull(deptDir.get("Horstmann", "Phone"));
}
Run the test class. Does the new test case pass? If not, why not?
Read the source code of get if you aren't sure.
get doesn't find deptdir.txt. Sadly, the method then silently makes an empty directory. This is actually very poor design that you should not do in your own code. Hiding a failure is always bad.
OK, let's put the deptdir.txt file into your lab5 src directory, using the command line to get more command line practice. Use the cp (copy) command. In its simplest usage, it has the form
cp sourceFile targetDirectory
What is your full command?
After copying deptdir.txt to your src folder, go to File > Refresh (F5).
Another way to do this is dragging deptdir.txt to your src folder in Eclipse. If Eclipse, somehow, cannot locate deptdir.txt, and FileNotFoundException is caught, then providing full-path to that file could help solve the problem.
IDEs are wonderful, but they do things behind your back all the time. This is one reason to learn about command-line tools. Command-line tools give you much more control, and they act in a more predictable way.
When the Java runtime executes the statement
Scanner in = new Scanner(new File(source));
and source is a relative path (i.e. one not starting with / or, in Windows, a drive letter followed by a colon), then it is evaluated relative to the “user directory”. That is normally the directory from which a program was started, but it is possible to change it. Eclipse changes it to the root of your project, as you can verify by adding
System.out.println(System.getProperty("user.dir"));
into the setUp method.
Add the print statement and run your test class again. What directory is displayed?
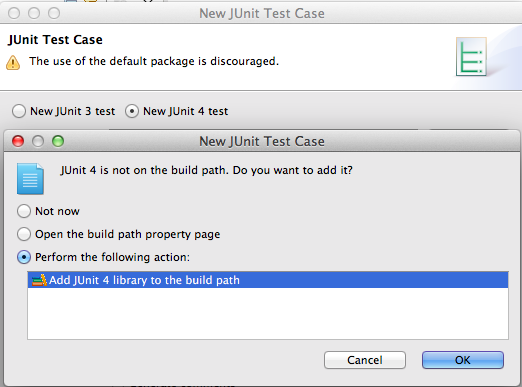
load to src/deptdir.txt to properly specify the directory?junit-4.11.jar from http://github.com/junit-team/junit/downloads
Using shell commands, make a directory /path/to/project/lib and copy the JUnit JAR file into that lib directory. As always, replace /path/to/project with the path on your system.
What shell commands did you use?
cd command, change to the base directory of the project (i.e. /path/to/project). Then issue the command
find .
That is, the command find followed by a space and the period.
The period denotes the current directory.
What output do you get?
Your output should show a directory hierarchy with directories src, test, lib, and build. If not, you didn't do the previous step correctly.
ArrayListAddressBookTest class?Use this command line
java -classpath build/test/classes:build/classes:lib/junit-4.11.jar org.junit.runner.JUnitCore ArrayListAddressBookTest
Note that some system, for example, Windows system, use ";" instead of ":" when linking external libraries for classpath.
What happens?
If you don't get something indicating success, you did something wrong. Keep trying until you get it to work. To put it simply, the command above may only work with Netbeans, and I'm uncertain if it works even when using Netbeans.
You may wonder what things that are passed to -classpath. Each token that is separated by colon ":" is path to directories that contain binary files of your java test cases and your java application binary files. The last token points to the JUnit library jar file.
Next, org.junit.runner.JUnitCore is JUnit main class that contains the main method.
Make sure you know the path to folders mentioned above before working on this command.
Sorry, no green bar. You can use this command in a script that you can run automatically after compiling your code. This is a very common practice.
java -classpath ... org.junit.runner.JUnitCore ArrayListAddressBookTest
what is the significance of the class org.junit.runner.JUnitCore?
(You can get a hint by running java -classpath lib/junit-4.11.jar org.junit.runner.JUnitCore)