
This work is licensed under a Creative Commons Attribution-Noncommercial-Share Alike 3.0 United States License.
Copyright © Cay S. Horstmann 2013 - 2015
This work is licensed under a Creative Commons Attribution-Noncommercial-Share Alike 3.0 United States License.
Modified by:
git init).gitignore, git add)git commit -a -m "...")gitk) git clone, git push, git pull)These instructions are for Ubuntu or the Lubuntu Virtual Machine.
git config --global user.name "Your name"
git config --global user.email "username@mailserver.com"
(Of course, replacing "Your name" with your name and username@mailserver.com with your email address)
ls ~/.ssh
If you get a directory listing showing (among others) a file id_rsa.pub, then skip the key generation.
Otherwise run
ssh-keygen -t rsa -C "Your name <username@mailserver.com>"
(of course, replacing Your name with your name and username@mailserver.com with your email address). When prompted for a passphrase, you can enter a passphrase, which is more secure, but you have to enter it whenever you use the key. Or just hit Enter to skip this.
Do not change the name of the key that is being generated. It should be id_rsa.
cat ~/.ssh/id_rsa.pub
This key is needed to allow you access to the git server (in Step E).
A version control system remembers the changes that you made to the files in a project. This is useful (even essential) for two reasons:
The database that contains the changes to a project is called a repository. When you interact with a version control system, you contribute your changes to a repository, fetch the latest changes that are contributed by others, or occasionally undo some changes.
Many version control systems are in common use. In this lab, you will learn about a version control system called git which is used in many projects.
Open a terminal window and use the cd command to change to the directory containing the project. (That is, the directory containing the src and bin subdirectories.)
Using Emacs or any text editor, create a file .gitignore in that directory with the following contents.
bin
.settings
Now run
git init
git status
What output do you get?
git command interacts with a git repository.
The git init command initializes a repository. You issue it once when you start a project, or when you decide to add version control to an existing project.
The git status command shows the current status of the files in your project. At the beginning, you are told that .gitignore and the src directory are untracked. Add them:
git add .gitignore src
Now run git status again. What output do you get?
As you just saw, all files in the src subdirectories that are not excluded in the .gitignore file are added.
Git Rule #1: Add any files that you create to the tracking set with git add.
git commit -a -m "initial checkin".
What output do you get?
-a option means to add changes to the repository. (Don't confuse -a with add, which means to add files to the tracking set.) It is not useful to run git commit without -a.
The -m option lets you put a brief message describing the reason for the commit. (You usually commit after adding a feature or fixing a bug.) A message is required.
Some people like to put longer commit comments, describing the commited change in detail. That is best done from an IDE—see Part C.
Git Rule # 2: Always use -a -m with git commit.
Now run git status again. What output do you get?
git status has nothing to report, then all files are up-to-date.
Edit the file src/AddressBook.java in Eclipse. Make some change; for example, remove the first javadoc comment. Save the file.
Now run git status again. What output do you get?
git commit without a -a. What happens?git commit -a -m "..."
Now the repository contains both the original version and your latest changes.
To see the difference between them, run
gitk
What happens?
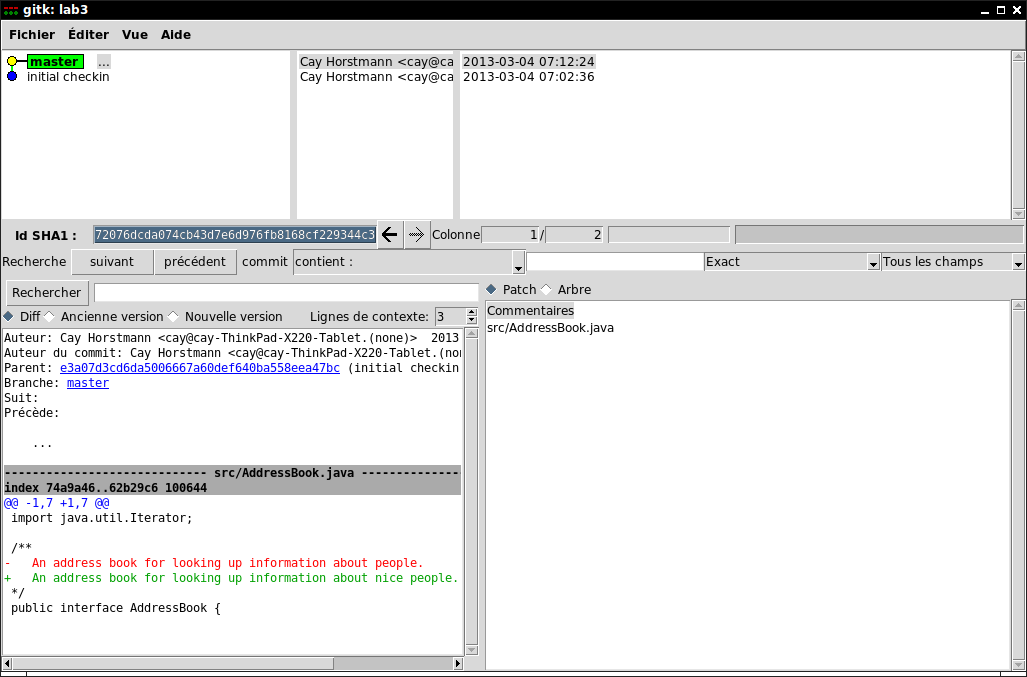
src/AddressBook.java?Click around until you can see the old version of the src/AddressBook.java file.
If you ever need the old file back, you can copy/paste it from gitk, or you can use the git revert command. That is more convenient inside Eclipse—see section C.
You have just seen one reason to use a version control system: To get an old version of a file back. It's as if your file system had an undo button!
(But remember, you must enable the undo by periodically running git commit. You can only get back committed versions.)
find
You will see the src subdirectory containing your files, and next to it, a .git directory containing the repository data.
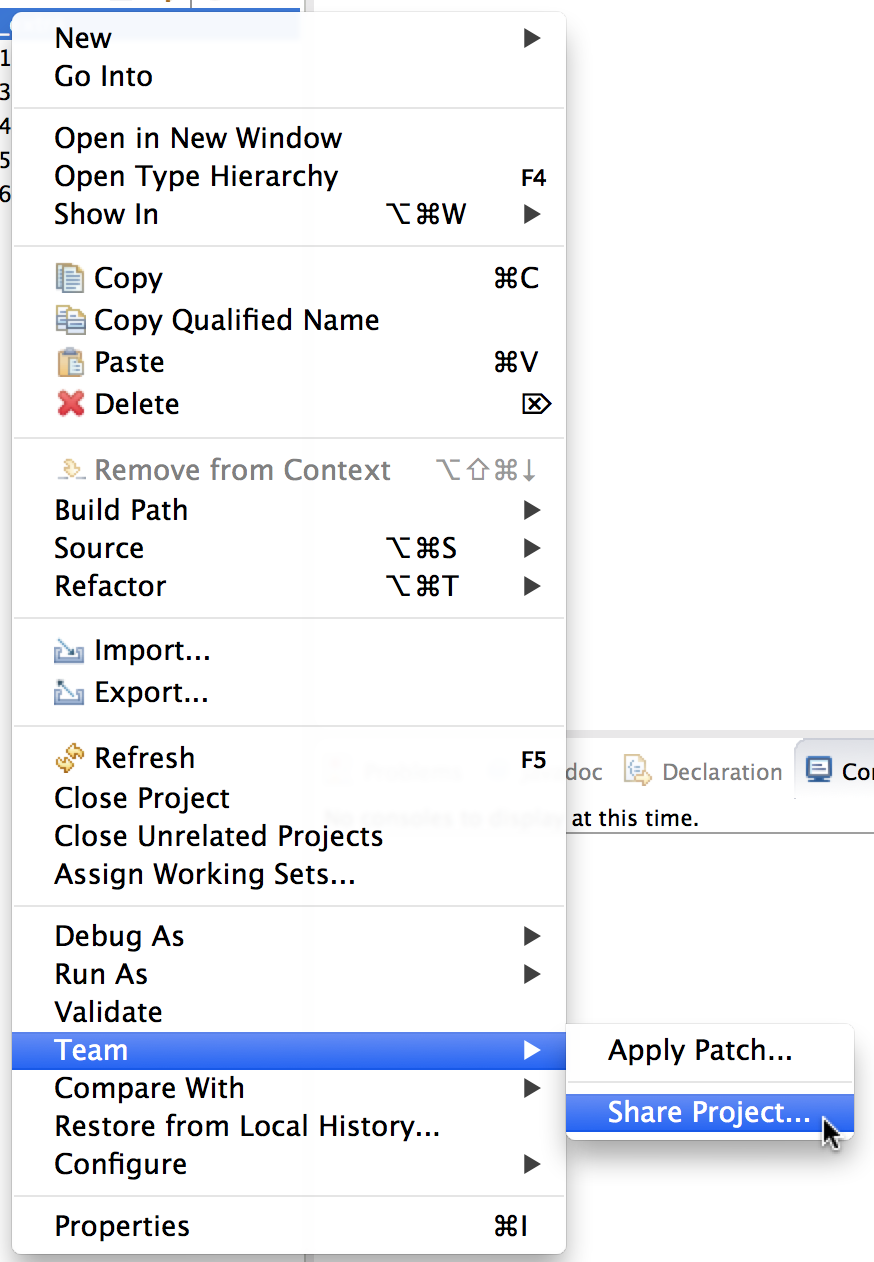
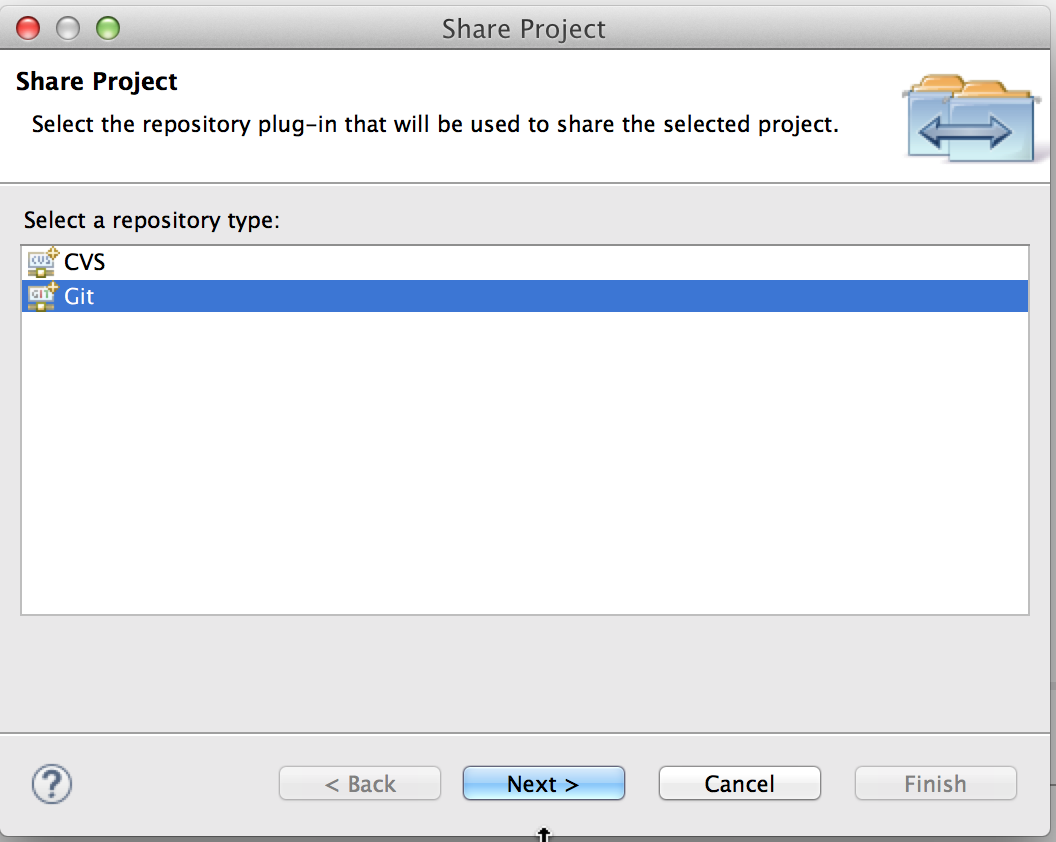
In order to use Git in Eclipse, you need to install EGIT plug-in. It's FREE!!!
To check whether Egit is installed on your computer, go to Help > Installation Details (Mac), and see if EGit is listed in the list.

If EGit is not available, use the Eclipse version in the virtual machine.
If you don't see that, double-check that you really opened the project in the workspace directory that contains the .git folder.
Eclipse Project Manager puts all share projects in the same git folder for management. That folder is put in your workspace folder. When you start sharing your project, your project folder will be moved to this git folder.
@author). Save your file and look at the Projects tab.
What do you notice about the file name?
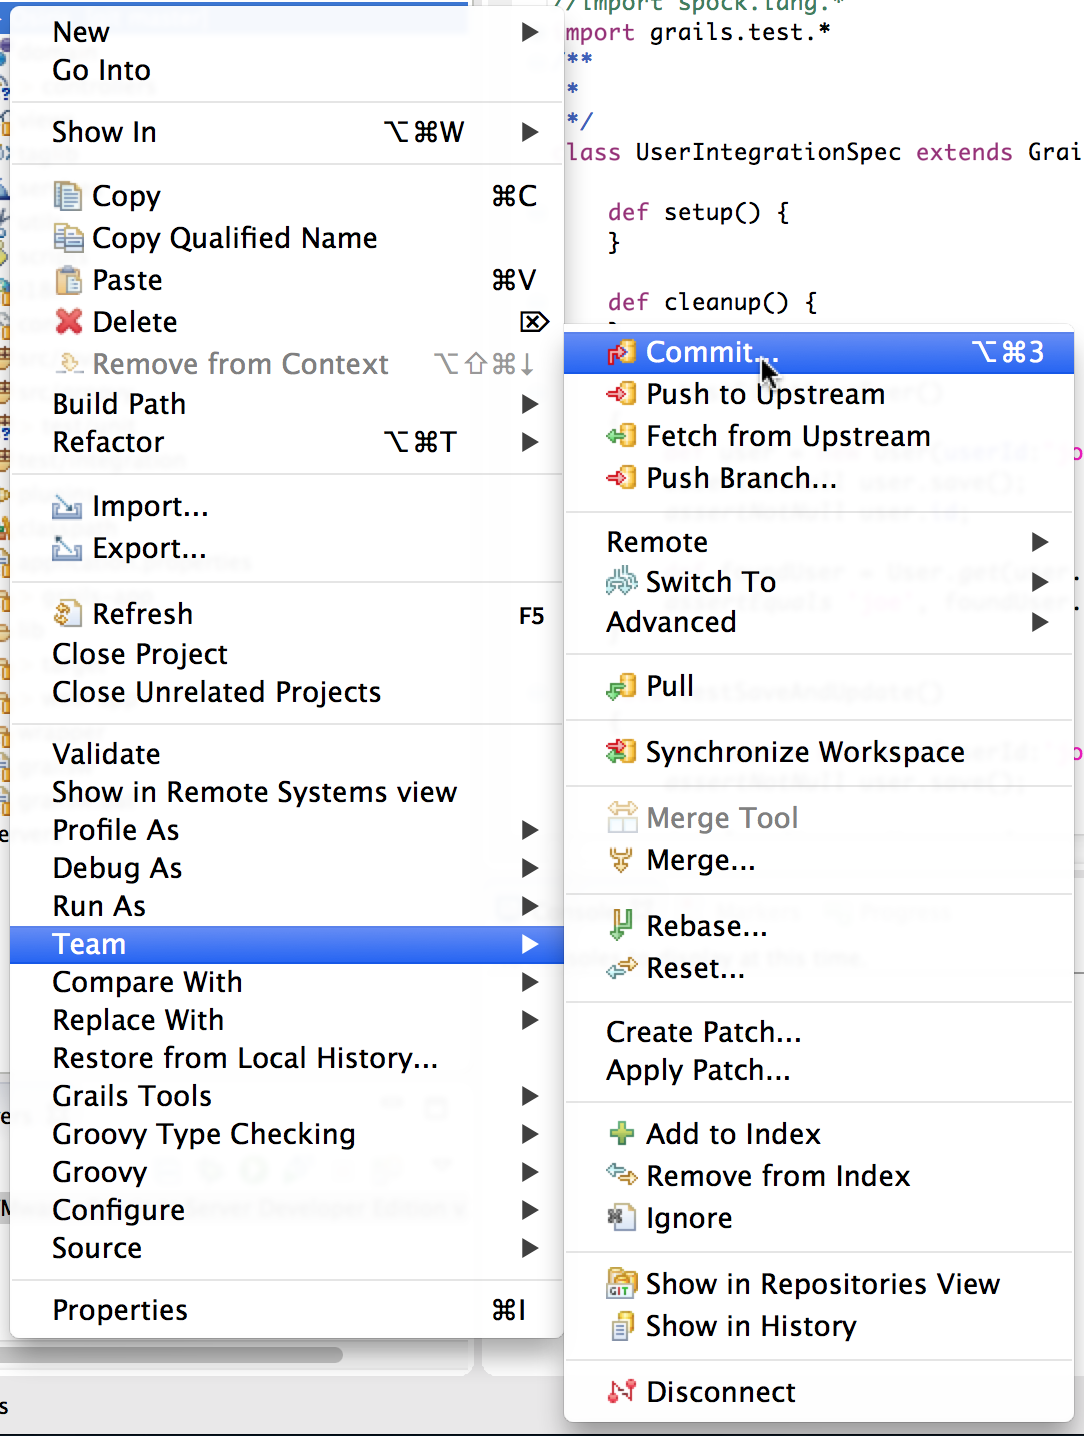
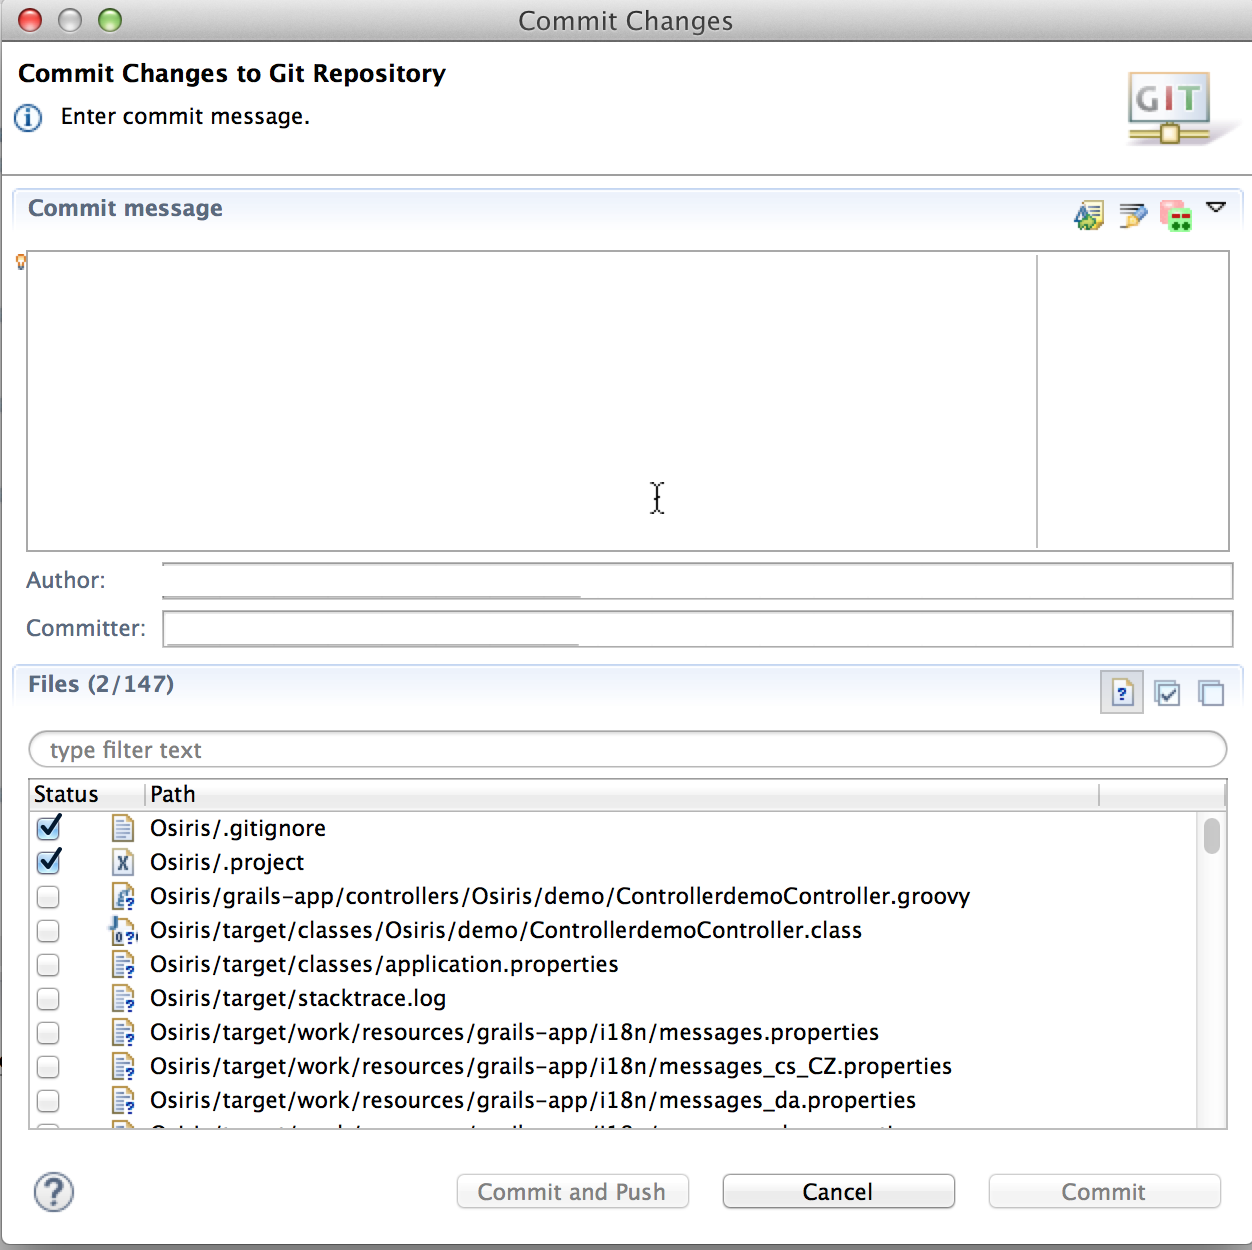
It lists the file(s) that have changed and you can type a commit message that is as detailed as you like.
Type an appropriate message and click Commit.
When you add files, they show up in green. Eclipse automatically issues an git add before committing them.
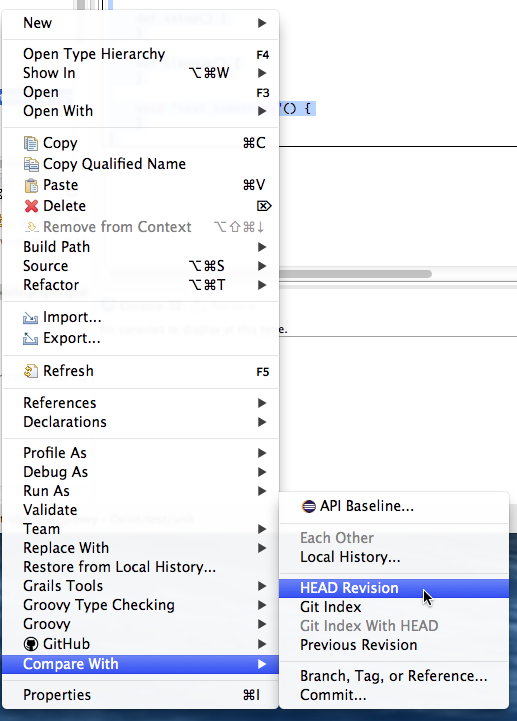
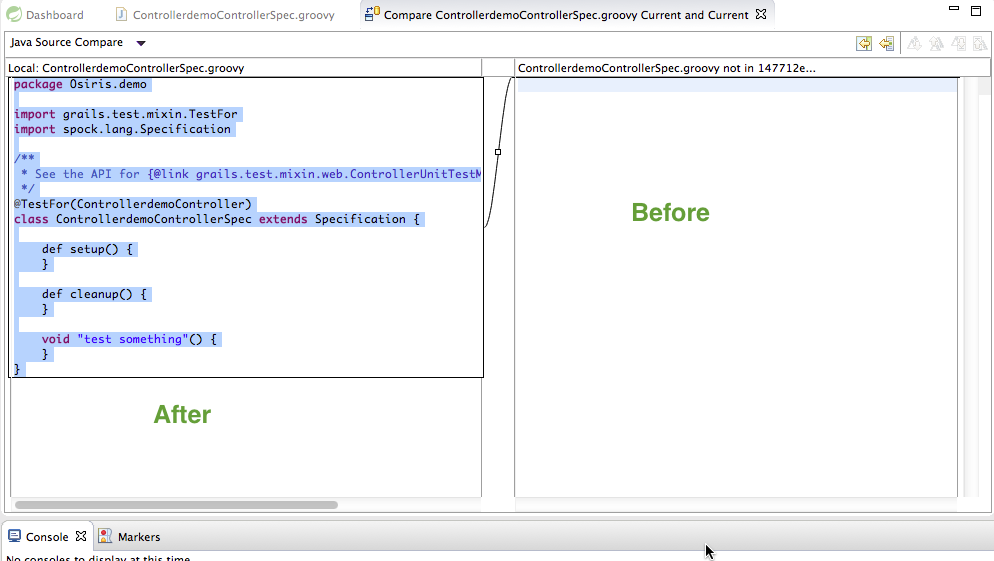
Once in a while, you may want to know how one of your local files differs from the repository.
Make a change to InOut.java, such as adding a comment explaining the purpose of the interface. Then right-click on the file in the Projects -> Compare With. You will see a graphical display of the differences.
How do you get back an older version?
As a rule of thumb, it is a good idea to use the command line for “big ticket” commands, such as git init and git clone. (Lots of things can go wrong with these, and the IDE often hides the error messages, making it hard to diagnose what is going on.) Common commands such as git commit and git revert are most convenient in the IDE.
If you use the Linux virtual machine, you need to click on the USB icon at the bottom of the VirtualBox page and select your USB device. This may or may not work. If it doesn't, consider these steps:
Your USB stick will show up somewhere in the /media or the /media/user directory.
Type ls /media. What do you see?
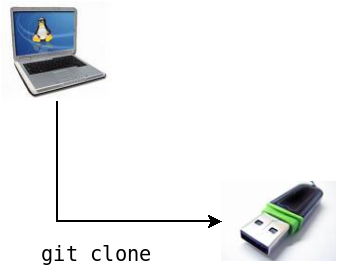
cd path/to/lab7
git clone --bare . /path/to/USBStick/lab7
Then verify that a lab7 directory has been created on the USB stick.
This directory is now a “clone” of your project, except for some differences set by the “--bare” option, briefly explained below.
First, your fellow developers need a copy of the master.
Inserts the USB stick into your buddy's laptop.
Clone the repository onto that laptop:
git clone /path/toUSBStickOnBuddyLaptop/lab7 /path/to/buddysCourseDirectory/lab7
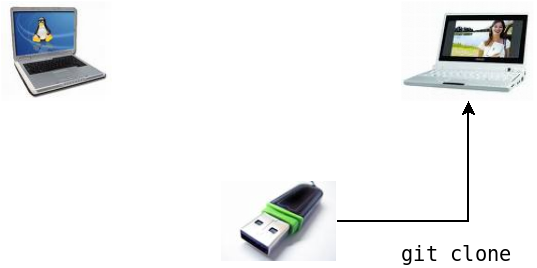
Your buddy starts Eclipse and makes a Java project with the files in /path/to/buddysCourseDirectory/lab7.
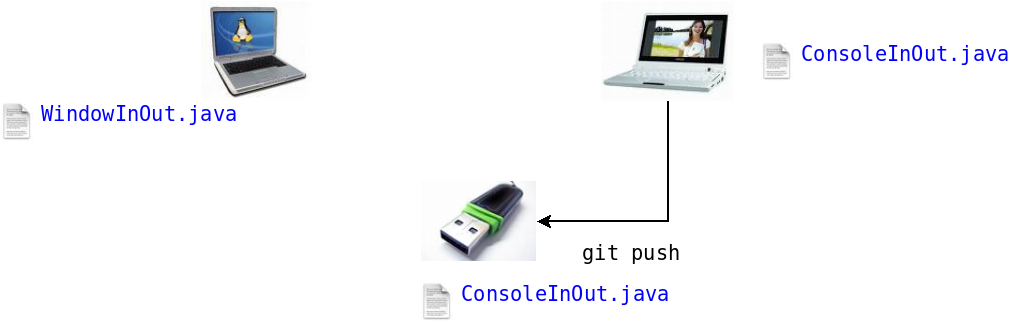
@author Your Name.@author Your Buddy's Name.cd /path/to/buddysLabDirectory/lab7 git push /path/toUSBStickOnBuddyLaptop/lab7
Now your buddy's changes are on the USB stick.
If you missed the --bare flag in creating the repository on the USB stick, your push will likely not work. But, if you are running an old version of git, it might. If you are having problems pushing changes, you can instead cd into the USB repository and pull the changes from your computer.
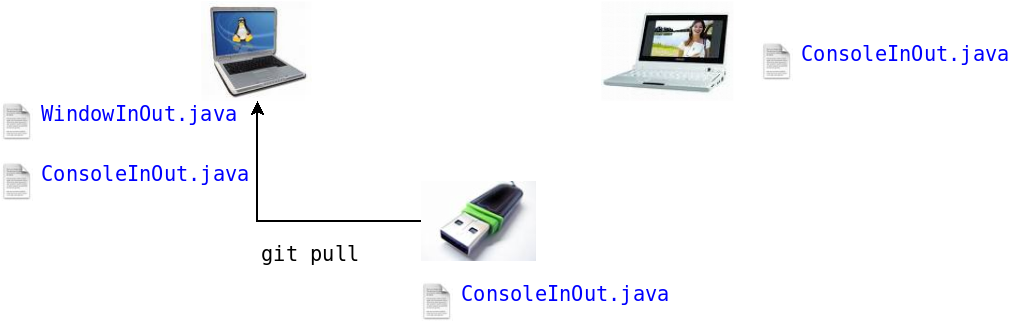
git pull /path/to/USBStick/lab7
What happens?
Now run git status again. What output do you get?
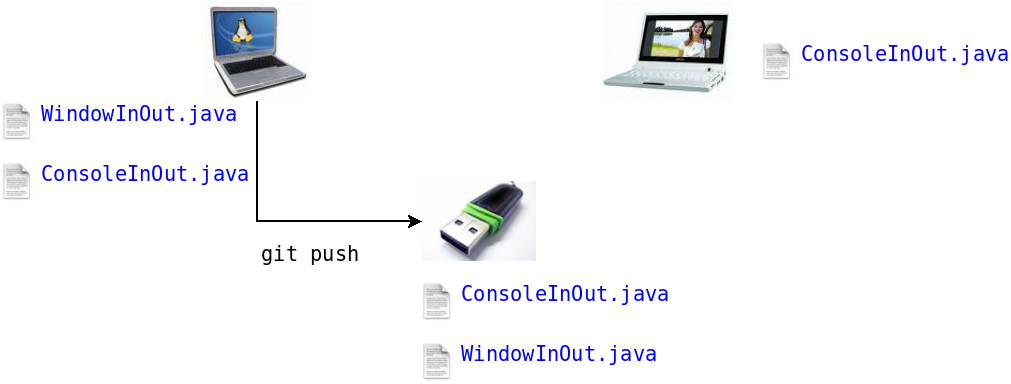
git push /path/to/USBStick/lab7
Now your changes are on the USB stick.
How does your buddy get your changes?
This scenario illustrates
Git Rule #3: Always pull before you push.
If you push your changes without first pulling other changes, the shared repository (and not just yours) will contain multiple change sets (or multiple “heads”). Multiple heads aren't good, and it is harder to fix them on the shared repository than yours.

AddressBook.java and adds a line @authorYour Buddy's name, followed by
git commit -a -m "Added @author tag"
git pull /path/toUSBStickOnBuddyLaptop/lab7
git push /path/toUSBStickOnBuddyLaptop/lab7
You take the stick back, edit AddressBook.java and add a line @author Your name, followed by
git commit -a -m "Added @author tag"
git pull /path/toUSBStick/lab7
What happens?
git diff
Will show you differences in AddressBook.java.
What happens?
The <<< === >>> symbols are “conflict markers” that point you to the part of the code that you need to fix.
Edit the file so that it becomes
@author Your name, your buddy's name
What do you do to save your changes to the shared repository?
Conflict markers sound scary, but experience has shown that they are quite rare in practice. Most of the time, team members don't edit the same part of a file, and merging works without generating conflicts. And when conflicts occur, they are usually easy to resolve.
Create an account on GitHub
In the settings page, select SSH keys and then the Add SSH key button. Give it some title (e.g. my-laptop-2015), and then paste what you get from typing
cat ~/.ssh/id_rsa.pub
Create a project lab7. Leave it public for now--you can junk it after you are done with this lab.
Follow the directions for “…or push an existing repository from the command line”. Run these commands from inside the lab7 directory.
How can you tell that your files are now up on the github server? (Hint: Visit the project page.)
lab7 project, and then run
git clone git@github.com:yourgithubusername/lab7.gitWhat happens on your buddy's machine?
lab7 project on Github.You now know enough about git to manage your personal projects and small team projects.